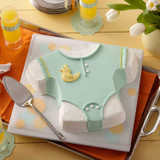

Welcome New Baby Cake
-
AmountCake serves 12.
Ingredients
Instructions
Click to mark complete
Prepare Icing
We suggest that you tint all icings at one time while cake cools. Refrigerate tinted icings in covered containers until ready to use.Make 4 ¼ cups buttercream icing:
Tint ½ cup rose
Tint ¼ cup green
Tint ¾ cup yellow
Tint 1/4cup copper (skin tone)
Tint ¾ cup blue
Tint ¼ cup black
Reserve 1 ½ cups white (thin 1 cup with 1 tablespoon light corn syrup)Decorate in Order
Ice background area and wheels smooth in thinned white icing.
- Using tip 3 and blue icing, outline buggy hood.
- Cover buggy hood with tip 16 blue icing stars.
- Cover buggy body with tip 16 rose icing stars and white icing stars in a checkerboard pattern.
- Using tip 12 and yellow icing, pipe in rim area. Using tip 3 and yellow icing, trim with scallops and dots.
- Outline wheels with tip 12 and yellow icing.
- Using green icing and tip 16, pipe wheel spokes, and add rosettes. Add outline and swirl for buggy handle.
- Ice cookie smooth in copper (skin tone) icing. Position on cake top for baby's face.
- Using tip 3 and black icing, pipe in. mouth eyes and swirl of hair.
- Using tip 3 and rose icing, pipe in dot cheeks. Smooth with finger dipped in corn starch.
Baking Instructions
Preheat oven to 350°F or temperature per recipe directions. Before first and after each use, we recommend hand washing pan in warm soapy water. Your cake will unmold easily, without sticking, when you prepare the pan properly. Grease the inside of pan using a pastry brush and solid vegetable shortening (do not use butter, margarine or liquid vegetable oil). Spread the shortening so that all indentations are covered.Sprinkle about 2 tablespoons flour inside pan and shake so that flour covers all greased surfaces. Turn pan upside down and tap lightly to remove excess flour. If any shiny spots remain, touch up with more shortening and flour to prevent cake from sticking. (You can use vegetable oil pan spray or Wilton Cake Release or Wilton Bake Easy™ Non-Stick Spray, in place of solid shortening and flour).
Make one 2-layer cake mix according to package or recipe directions. Pour the cake batter into pan, and if necessary, spread the batter around with a spatula to fill all areas of the pan evenly. Be careful not to touch sides or bottom of pan.
Bake cake on middle rack of 350°F oven for 40-45 minutes or until cake tests done according to recipe directions.
Remove cake from oven and cool on cake rack for 10 minutes. While the cake is still in the pan, carefully slice off the raised center portion of the cake. This allows the cake to sit more level and helps prevent cracking.
To remove cake from pan, place cooling rack against cake and turn both cake rack and pan over. Lift pan off carefully. Cool cake at least one hour. Brush loose crumbs off cake.
To transfer cake to serving board, hold a cake board against cake and turn both cake and rack over. Lift off rack. Hold another board against bottom of cake and turn cake over. Be sure to hold cake, rack and board close together while turning to prevent cake from cracking.
Notes
How To
Reviews
Enjoyed this recipe?Why not try one of these!
-
 $0.00
$0.00 -

Natural Curl Baby Cake
$0.00 -

-
 Advanced
 -
 Intermediate
 -

Pink & Blue Baby Shower Cake Pops
4 hr 30 min
Beginner -

Edible Cake Paint Cake
$0.00Beginner -

-

Tulip Cake
$0.00


