Exotic Painted Orchid Cake

Exotic Painted Orchid Cake

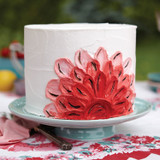
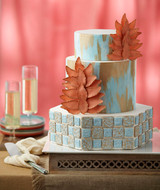
Create a simple and stunning Exotic Painted Orchid Cake for your next celebration. White orchids signify innocence, elegance and beauty, making this cake ideal for a wedding or baby shower. A striking painted accent on the base of this cake helps add a fun pop of color.
  • Amount12

Instructions

Click to mark complete

  1. Ingredients:

    • Ready-to-Use Gum Paste (5 oz. needed)
    • Goldenrod Color Dust
    • Deep Pink Color Dust
    • White Color Dust
    • FoodWriters Edible Color Markers
    • Favorite cake mix or recipe (6 cups batter needed)
    • White Ready-to-Use Decorator Icing – 4.5 lb. Tub (6 cups icing needed)
    • Decorator Preferred Fondant (24 oz. needed)
    • Color Right Performance Color System
    • White-White Icing Color

    Supplies:

    • 9 in. Fondant Roller
    • Gum Paste Flower Cut-Outs Set (orchid throat, orchid sepal and orchid wing petal cut-outs used)
    • Gum Paste Storage Board
    • Gum Paste Flowers Drying Rack
    • 6 in. x 3 in. Round Pan
    • Cooling Grid
    • 20 in. Fondant Roller
    • Fondant Smoother
    • 5 pc. Decorating Brush Set
    • Gum Paste Wire and Tape
    • Wire cutters
    • Needle nose pliers
    • Drinking straw
  2. One week in advance, make flowers.

    Using white gum paste, make four or five orchids following instructions in cut-outs set. Flowers will take four days total to make.

    • Day 1: Make stamen.
    • Day 2: Make throat, sepals and wing petals, attaching sepals to wing petals.
    • Day 3: Dust center of throat with goldenrod Color Dust and outer petals of throat with deep pink Color Dust. Dust petals with white Color Dust. Use color markers to add dots to throat. Assemble flowers.
    • Day 4: Let flowers dry 24 hours.
  3. Prepare cake.

    Bake and cool two 3 in. cake layers. Fill and stack for 6 in. high cake. Prepare cake for fondant. Cover cake with white fondant.

  4. Paint side of cake.

    Make cake paint following formula provided (4 drops blue base color + 2 drops pink base color + 3 drops black base color + 4 to 5 drops water). Using fine-tip brush, paint small plus signs in five to six groups at base of cake. Paint small upward strokes above plus signs. Let set about five minutes.

    Using slightly dampened wide flat brush, brush over upward strokes, pulling color up towards top of cake. Let set about five minutes.

    Using fine-tip brush and white-white icing color, paint upward strokes over blue strokes.

  5. Make flower branch.

    Tape together three bunches of wire, one bunch with five wires and two bunches with three wires each. Tape one three-wire bundle to five-wire bundle about 1 in. from top of five-wire bundle. Continue taping an additional 3 in. to make stem one long branch. Reserve remaining three-wire bundle for later step.

  6. Add flowers to branch.

    Tape flower stems to long branch, leaving about 10 in. of branch open at top.

  7. Add flower branch to cake.

    Cut drinking straw to 5 in. long. Plug end of straw with fondant and insert entire straw into top of cake. Place flower branch in straw. Slightly curl remaining three-wire bundle and insert into straw.

    Makes 12 servings.

Notes

How To

Reviews