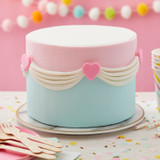

Christmas Fondant Cake With Silver Shimmer
-
AmountCake serves 13.
Ingredients
6 3/4 cups batter Your favorite cake recipe
Buttercream Frosting
36 ounces Decorator Preferred White Fondant, 24 oz. Fondant Icing
2 cans Silver Color Mist Shimmering Food Color Spray, 1.5 oz.
FoodWriter Color Fine-Tip Edible Markers, 5-Piece
Royal Icing Mix, 14 oz.
Tools
Performance Pans Oval Pan Set
Cake Boards
Cake Leveler, Small, 10-Inch
Decorator Preferred 13 inch Angled Spatula
Roll and Cut Fondant Mat
Fondant Roller, 20-Inch - Fondant Tool
20inch Rolling Pin Guide Rings
Fondant Smoother
Fondant Trimmer
Waxed paper
food-safe scissors
Toothpick
paper napkins
12 in. Disposable Decorating Bags
Round Cake Decorating Tip 1
Round Cake Decorating Tip 4
Instructions
Click to mark complete
- Make layered cake. Prepare batter following recipe directions. Bake and cool three 7.75 in. x 5.6 in. cake layers. Prepare buttercream icing following recipe directions. Level, fill and stack layers on cake board, cut to fit, for 3-layer cake, 6 in. high. Use spatula and icing to lightly ice cake. Reserve remaining white icing.
- Cover cake in fondant. Use fondant roller with orange guide rings to roll out fondant 1/8 in. thick. Cover cake with fondant.
- Spray cake. Prepare royal icing according to package directions. Use edible color marker to transfer pattern to waxed paper. You will need two patterns, one with just the outline of the tree and the other with tree details. Use tip 1, a cut disposable decorating bag and dots of royal icing to attach the outline tree pattern to side of cake. Use silver food color spray to cover cake. Let dry, about 15 minutes. Repeat until desired color is achieved, drying in between coats. Carefully remove pattern.
Decorate cake. Use tip 1 dots of royal icing to attach the tree detail pattern to side of cake. Use toothpick to mark tree details. Remove pattern and wipe off any icing residue from cake using lightly damp paper napkin. Use tip 1, a cut disposable decorating bag and royal icing to pipe design.
Use tip 4, a cut disposable decorating bag and buttercream icing to pipe bead bottom border.
Notes
How To
How to Pipe Beads
The bead shape makes impressive borders outlines and accents on letters and designs; also a cute trim on clothing and gingerbread houses. The basis for making piped hearts and figure piping.
How to Pipe an Outline
Characters or designs are often outlined first, then piped in with stars or zigzags. Outlines can also be used for facial features.
Reviews
Enjoyed this recipe?Why not try one of these!
-
 $0.00
$0.00 -

Fondant Wedding Cake
$0.00 -

Draped Fondant Cake
4 hr 30 min
Beginner -

Fondant Flower Cake
76 hr 20 min
Beginner -
 Intermediate
 -

-

-

Fondant Lion Cake
$0.00 -

Fondant Monogram Cake
$0.00Beginner -

Fondant Monkey Cake
$0.00 -

Fondant Wedding Cake
$0.00 -

Draped Fondant Cake
4 hr 30 min
Beginner -

Fondant Flower Cake
76 hr 20 min
Beginner -
 Intermediate
 -

-

-

Fondant Lion Cake
$0.00 -

Fondant Monogram Cake
$0.00Beginner -

Fondant Monkey Cake
$0.00 -

Fondant Wedding Cake
$0.00 -

Draped Fondant Cake
4 hr 30 min
Beginner -

Fondant Flower Cake
76 hr 20 min
Beginner -
 Intermediate
 -

-


